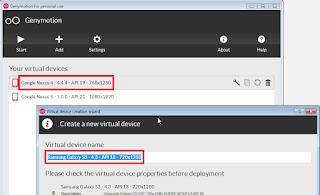
Genymotion
Genymotion is a widely used Android emulator, which is an alternative to the vanilla emulator bundled with the Android SDK. It runs virtual devices on Oracle VM VirtualBox making them much faster.
Calabash
Calabash is my choice of automation tool for iOS and Android devices.
GenyControl
GenyControl is a collection of shell scripts I wrote to control Genymotion devices and run Calabash tests. Its purpose is to make sure that only the requested Genymotion device is running. Also to wait until the emulator is properly started and booted before the tests are run. In this article I will explain how it works and how to use it. Feel free to clone it from GitHub:
https://github.com/madarasz/GenyControl
It is composed of two files: control_genymotion.sh and run_test.sh
https://github.com/madarasz/GenyControl
It is composed of two files: control_genymotion.sh and run_test.sh
control_genymotion.sh
control_genymotion.sh defines functions to start and stop emulators and wait until the requested emulators are functional. The most important functions:- stop_all_genymotion()
Stops all running Genymotion devices. It sends the poweroff signal to the VMs and kills any remaining processes. This is a safe way to stop these virtual devices. - get_genymotions_running()
Starts requested Genymotion device(s) and waits until they are operational. You need to pass the name of the Genymotion device you wish to use. First it waits until the device appears on the adb devices list. Then it waits until the "Android" logo disappears which signifies that the booting process is done and the device is operational. - get_all_genymotion_names()
Lists the names of all available Genymotion devices.
run_test.sh
run_test.sh prepares the Genymotion device (using the functions of control_genymotion.sh) and runs the Calabash tests. In order to make it work, you need to set the following environment variables:- $DEVICE: device name of requested Genymotion simulator
- $PNAME: package name of the application to be tested (i.e. com.madarasz.exampleapp)
- $APK_PATH: path+filename of the apk to be tested (i.e. build/apk/example.apk)
- $MORE_PARAMS: additional parameters to be used in the Calabash run command (i.e. --tags @smoke)
- $COLORS: set it to "yes" if you want to have ANSI color codes in the output (making it prettier if your terminal supports such)
- add the directory of adb (Android Debug Bridge) and player (Genymotion VM player - default directory on Mac: /Applications/Genymotion.app/Contents/MacOS) to $PATH

Jenkins integration - Let's put it all together
Plugins
For this example, I use the following Jenkins plugins:
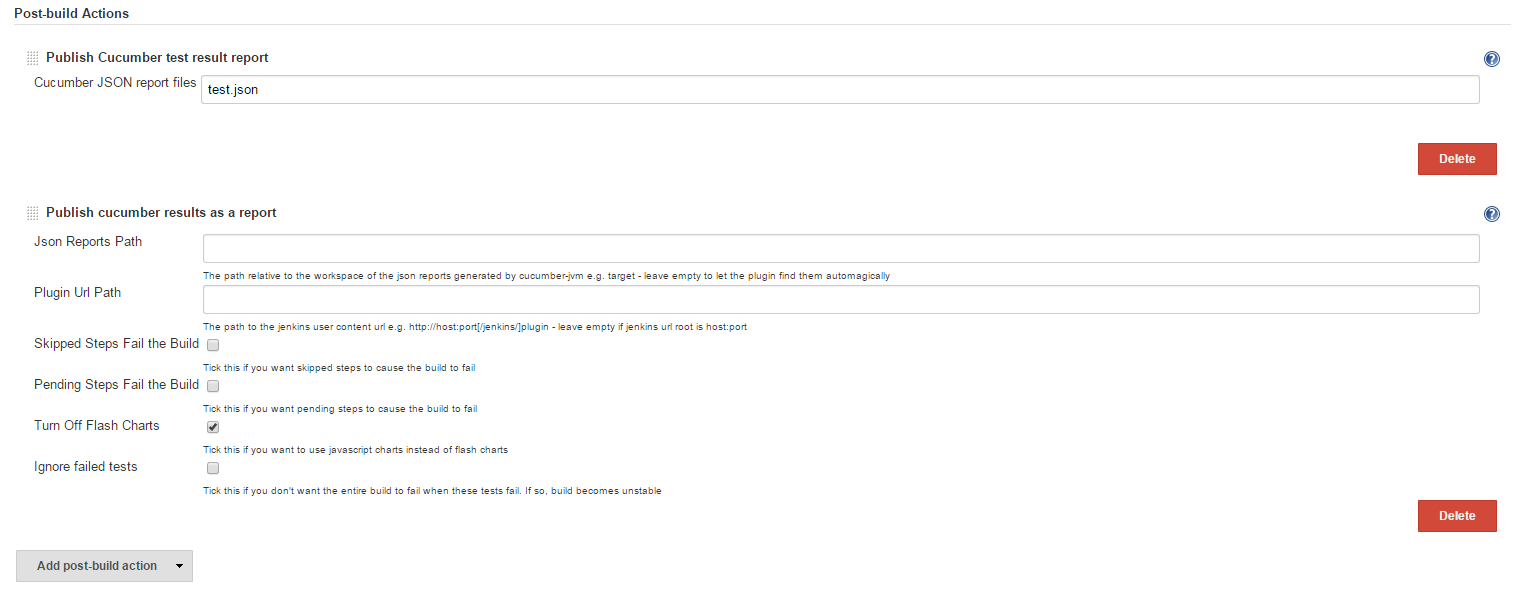
- Cucumber Reports Plugin: creates nice HTML reports on the Cucumber test runs
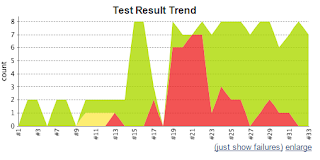
- Cucumber Test Results Plugin: adds the "test results trend" graph to the job
- EnvInject Plugin: lets you inject environment variables to the job in a nice way
- AnsiColor Plugin: enables colors in the Jenkins log
Setup
The Jenkins integration goes the following way:
- Put control_genymotion.sh and run_test.sh into your project folder.
- Create a new job as a Freestyle project.
- Configure Source Code Management, so Jenkins will check out your project from SVN or Git. (Alternatively you set Use custom workspace in Advanced Project Options to use a local folder for the project files.)
- Set environment variables and enable Color ANSI Console Output in Build Environment section.
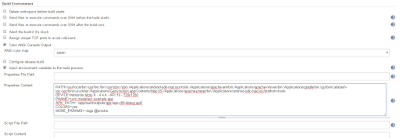
- Add an Execute shell build step like so:
set +x
source run_test.sh
(I use "set +x" to avoid echoing every bash command in the Console Output) - Configure reporting in Post-build Actions. Add both Cucumber reports:


Results
If you have done everything right, you should have:
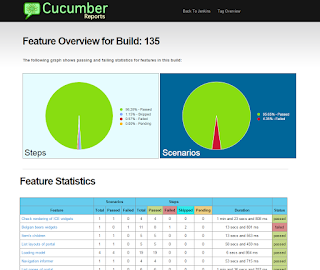
- nice Cucumber reports
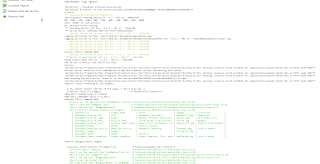
- colorful logs in the Console Output
- Test Result Trend graph